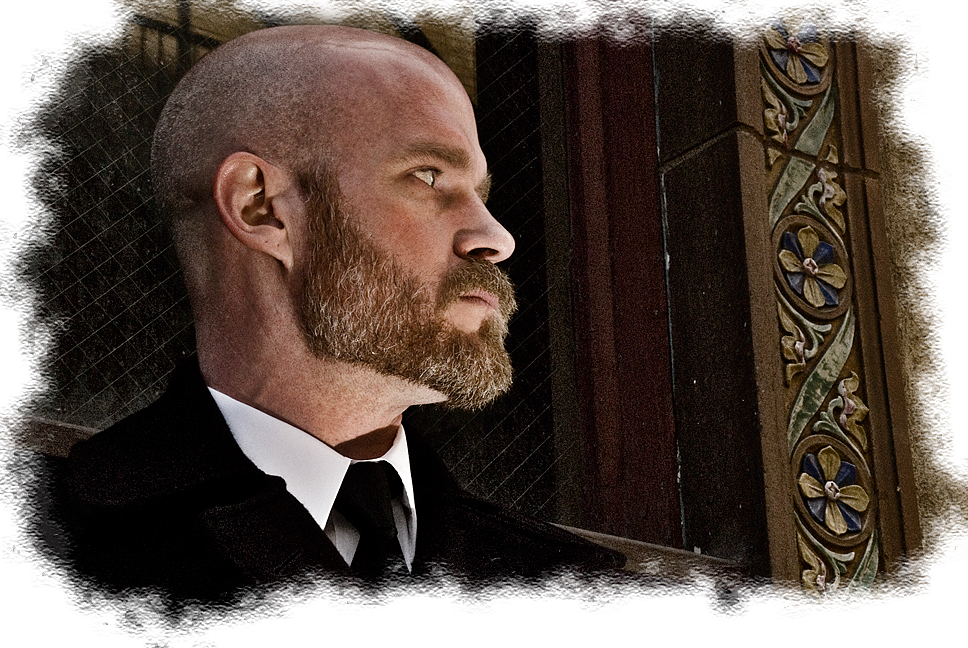
You’ve created your Masterpiece! Now what?

I will be teaching a class at the Mt. Airy Art Garage this February 8th from 1 – 5pm on what to do once you have created that perfect work of art. It’s time to get it out to the world, but how?  This is going to be a ton of information all in one afternoon so bring your notebooks!

Topics covered will include:

  • Showing your art electronically
  • The importance of quality presentation of the art (such as quality photos of the art)
  • Websites, free, cheep, easy and advanced
  • Networking, where and with whom
  • Organizational alignments with community organizations like, oh the Mt. Art Garage for example?

Click the image below to sign up!

So you’re going to be there right?

Globus-Albany-class-flyer_site

Class Flyer

Like this post? Like it! Tweet it! Share it!  Pin it! Stumble it! or Tumble it! But please add a link back to this post. Thanks!

Breaking the Rules


As many of the regular readers of this site know, I am a huge fan of HDR (High Dynamic Range) photography. I love how you can create images that really pop and have deep, rich saturation of color.  In many cases, it can be over done to the point of surreal and almost (and in some cases, very) unrealistic. Many believe this is the only way to do HDR; it is the “HDR Rule.”


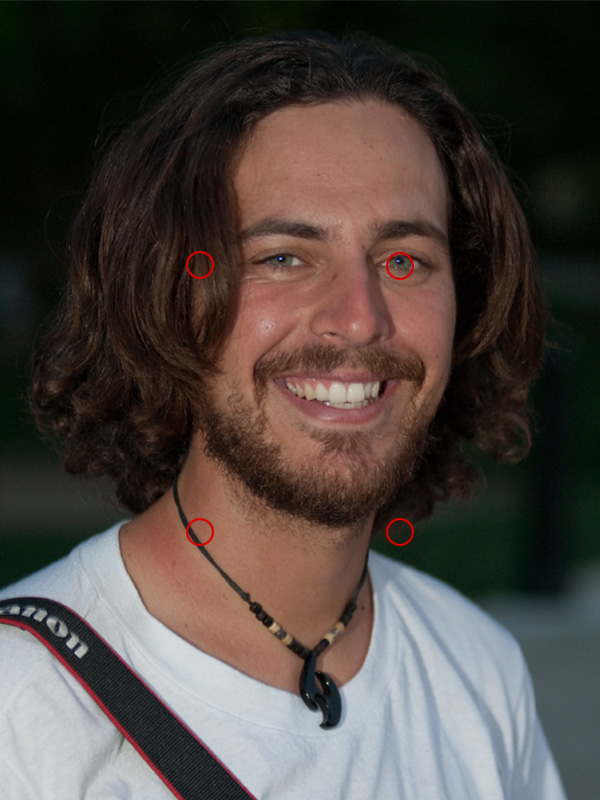
Another rule is the Rule of Thirds. In the rule of thirds the thinking is that you should divide an image into thirds or 9 cells as the image below shows. In the final image that you present it is strongly suggested that pour points of interest (POI) should be along those lines and even better, where they intersect (the red circles).


This rule is not a hard fast rule but one that is “strongly suggested.” Many images you have seen break this rule.  More however, almost break the rule. They way they will do this is to place a person into the image center but keep the eyes on the third mark and perhaps place one of the eyes over the POI intersection.  The latter is usually done by using a fast lens (2.8 or 1.4) and keeping the depth of field so shallow that one eye is softer and less sharp than the other eye. The sharper eye is then placed over the POI intersection to grab your attention.

This image I took this past weekend of a really nice guy I met in DC while shooting the Lincoln Memorial is a perfect example. Victor is from Holland and I have to give him a nod as he is traveling the US before starting his career this come summer. If all Dutch are as intelligent and friendly as Victor I am moving. Enjoy the rest of your trip Victor!


Anyway, back to my point. The image above shows Victor in the middle of the shot, however his eyes are on the top third parallel. In fact, his left eye (on our right) is exactly over the upper right POI. I superimposed the first image over Victor to show what I mean.


Obviously the image of Victor is not HDR. But whether your image is of people, still life or anything this rule is applied more often than not. The same is true of the over saturation and uber sharpening of what is called HDR. The reality is that HDR is High Dynamic Range, not High Reality Delusion.


In the image below I break another rule too. The rule that, “The horizon line should never divide the image in half.” This is just a variation of the rule of thirds so I won’t go into it again. Keep in mind this image is a composite HDR image made up of 4 separate images processed in the same fashion that I mentioned in my last blog post. Let’s look at the rules that have been broken here.


  • HDR Rule of Surrealism
  • Horizon Center Division
  • Rule of Thirds (sort of)


In fact, although I did separate the image in the center with the edge of the reflecting pool, and I created realistic saturation, I didn’t really break the Rule of Thirds. In fact, I multiplied it. Notice the Capitol Building. Not only is it the main subject in the upper third of the image, but so is the reflection of the building in the lower third. This actually broaches on another rule of only having one main subject per image. In fact, I do have only one main subject, I just have it twice. Does that break that rule too?
The main point of this post is simple. Rules are meant to be broken. The idea is to know the rules so that when you break them, you have a reason and purpose in doing so. Take the time to learn all the rules you can, study how they work, then go out and break them to show only a positive result.


How are you going to break the rules today? Leave a comment to tell us.


Until next time…

Happy Shooting!

HDR Images – Photomatix to Photoshop


On my last tutorial I showed you how to generate a good HDR image from Lightroom to Photomatix then to Photoshop. I got a few comments saying “I don’t use the plug-in!” or “I don’t have Lightroom!” Well, Photomatix is a standalone program too. So in this 3 part series of video tutorials I will walk you through the entire process starting in Photomatix and ending in Photoshop CS4.

This tutorial is a little longer than the last one totaling just under 30 minutes for all three parts combined. You may want to sit back and grab a cup of coffee before you start. I don’t think I sound boring, in fact I was surprised how long it took to get through it all because it felt like a lot less than that when I recorded it. Click the image below to watch part 1 then come back and watch the second two parts!

Part 1

Click the link below for parts 2 &3!
Read more

HDR in Photomatix Pro 3.2 (Plugin Version)


I was looking for information on Photomatix recently and I found very little helpful information. There were 5 pages of YouTube videos but 90% of them weren’t very helpful. So many of the videos said thing like, “I don’t use this slider/option so just leave it as it is.” Or, “This is how I use the software. I’m not sure what this does.” Unacceptable!

I took it upon myself to give a better overview of the software. I did not get into the batch processing, or any of the other tools that are in the stand alone program. I looked only at the Lightroom Plugin in the overview/tutorial. As it is, I had to do this in three parts. What I do is I take an older set of bracketed images and show you how Photomatix can manipulate the merged HDR image. I then re-import the image back into Lightroom and Photoshop and take the process through to saving the final image.

Below is part one.

Click the link below it to see parts 2 and 3.
Read more

Picking the Trash – 1 Handed Photoshop


First let me apologize for the lateness of my post. I spent last week reformatting and reloading my computer. And before anyone says I should use a Mac, A) I don’t like them and B) I chose to do the reformat, it wasn’t a crash. Every once in a while it helps to clean house and take out the garbage. That leads me to this weeks One Handed Photoshop tutorial.

Trash, garbage, crap. What makes an image any of these things? Do you delete or throw out “bad” images? If you do, STOP! If you don’t, its time to take a look at them again. I have always believed that all the images I take have some value, some how. I keep them all. I have over 40,000 on just one hard drive. That doesn’t include the hundreds of CDs and DVDs I have backups on or any of the negatives in that huge filing cabinet behind me.

Click the link to see what you can do with all that trash.
Read more

Hear That Noise? – More 1 Handed Photoshop


In this week’s video tutorial I take a look at noise and the different ways to reduce it. In the past, I thought that Photoshop, Camera Raw or Lightroom could clean up noise fairly well, and they can. Severe noise was another story and I thought I was just stuck with it. But then I learned what 3rd party plugins could do.

Talk about a difference! I was able to save images that I thought were lost to the noise. I mean we were talking the image versions of a heavy metal concert. Then I had a shoot where I got nothing but noise all day long. Shot after shot of noise infested images.

Check out the video and what I do about noise by clicking the link.
I broke down in desperation and bought Noiseware from Imagenomic (they also make Portraiture). I got it because I got a discount on it from being a member of NAPP. OMG what a difference! This stuff was astounding. It literally saved my entire day of shooting. From none of the image being usable to all of them being usable!

Then last week I got the most recent copy of Digital Photo Pro and they had a short piece on reducing noise. I thought “Great! I can use noise and maybe some of their tips for my next blog post. Their tips didn’t really work for me. The first step in the tutorial is very similar to what they were suggesting. Watch the video and see how it turned out.

So now you know why I use plugins. Simply put, they work. And if they save me time and effort and they work better, buy them. You will never look back. It’s not important that you buy the same versions I use. Get what works for you and your work flow. These are just what works for me. most have trial versions that you can try out so give them a shot!

Until next time…

Happy Shooting!

1 Handed Photoshop Part 3 – Edge Effects

Well, I am still in a cast and I am still doing everything one handed. The advantage I have over last week is moving my fingers is easier so i may be able to get this post typed in in less than a day! Check back at the end and see how I did.

This week I thought we would do some finishing touches on our image of James, popular guy that he is, I am getting tired of looking at him. So this week its Edge Effects! It seems that everyone wants to know how to do the best edge effect. Well that depends on a few things, the image, the look you want and how you wan the image to be seen. All depend on you!

Click the link to see the video
Read more

One Handed Photoshop – Basic Retouching


Well, it’s Monday and I have another One Handed Photoshop Tutorial for you! I apologize for the length of time it takes to make these. The videos themselves only take a few minutes its the typing the blog post that takes time. I am typing one handed after all. Drat! Now its Tuesday!

Anyway, I got such a positive response from the first 1 Handed tutorial I just had to keep going. That and the fact that I will be one handed for at least 3 more weeks. This time I took the same image and removed a few distractions and cleaned up a little razor rash.

You can view the full tutorial right after you click the link!
Read more

One Handed Photoshop – Make The Image Pop!


You probably know already that ice is slippery, but did you know it’s sneaky too? It is when its black ice. It was hiding in my driveway last week and it took my feet right out from underneath me. I remember hearing a distinct snap too. Then I realized that snap was my wrist. So here I sit typing a blog post with one hand. The other is in a cast and itching like mad!

I was due to write my weekly post over the weekend but now I can only type so much and its less than half as much when using only one hand. So I got to thinking, what can I do one handed that I can put on my site? 1 Handed Photoshop Tutorials were born!

Below is the first in what I hope will only be a short series of tutorials that can be done quickly and easily, and with only one hand, in Photoshop. This first one is on how to use the High-Pass filter to make your images pop out at the viewer. Click the link to watch the video and take a look!

Read more

“True” HDR Portraits (You Know, with Bracketing?)

On my last tutorial I received many comments on how changing the exposure level of a single raw file then creating an HDR image is not a ‘true’ HDR image. So I shot a bracketed self portrait and generated a new tutorial.  This is the image that resulted.

100104-Me_1510hdr

I am not sure how letting the computer in my camera do the bracketing is any less ‘true’ than doing the same thing manually in Lightroom or Photoshop.  But, I come from a purist photography background; as in I shot film, developed film and have lost years of my life in a dark room (go into the darkroom at 7 in the morning and come out and it’s still 7am, on a different day!), and I am actually fond of the smell of fixer.

I will admit that there are many, many photographs out there today that don’t look anywhere close to real. Some are meant to look that way but many more try to pass themselves off as some type of surreal reality.  I want people to know that you can achieve some very true to life images using HDR processing.

This morning I took many self portraits while bracketing 1/3 to a full stop. I shot sets of 3, 5 and 7 frames.  I found that when doing self portraits it is a bit more difficult to sit still than you think it is.  I was using a programmable shutter release (Nikon’s MC-36), my D200, one SB800 with a grid spot, and one SB900 for fill and of course a tripod.

In the tutorial below I start out with the three bracketed images and using Adobe Lightroom2, Photoshop CS4, Photomatix Pro3 and Imagenomic Noiseware Pro and I make what I think is a very true HDR self portrait. I do it all in about 15 minutes too! It’s actually very easy. Check it out! (tutorial should open in a new tab/window)

clickhere

This tutorial won’t fit on YouTube so if you want to share it, feel free but send your friends to this blog post.

I hope you enjoyed this tutorial and I think this should satisfy all those that wanted a ‘True HDR Portrait’.

Until next time,

Happy Shooting!